Arlecchino has cemented herself as one of Genshin Impact’s most formidable DPS units since her release in patch 4.6. The Knave, fourth of the Fatui Harbingers, brings a unique pyro-focused kit that rewards aggressive playstyle and precise team building. Whether you’re tackling Spiral Abyss or exploring Teyvat, understanding her mechanics, optimal builds, and team synergies is essential to unlocking her full damage potential. This guide covers everything you need to know to build, equip, and play Arlecchino effectively in 2026.
Table of Contents
ToggleKey Takeaways
- Arlecchino is a top-tier Pyro Polearm DPS in Genshin Impact who thrives on sustained field time and Blood Debt stacks, making her excels in Spiral Abyss single-target encounters.
- Optimal Arlecchino builds prioritize ATK% and Crit stats (65% CR / 165% CD) with Shimenawa’s Reminiscence 4-piece artifacts and Engulfing Lightning weapon for maximum damage output.
- Pairing Arlecchino with Yelan and Bennett creates a powerful Vaporize team that doubles damage multipliers and stacks ATK buffs multiplicatively.
- Level Arlecchino’s Normal ATK talent to 9-10 as your priority since it drives the majority of her DPS—crowning this talent first yields 12-15% overall damage increase.
- Elemental Mastery (100-150 EM) becomes essential when building Vaporize compositions, adding approximately 60% additional damage despite being a secondary stat.
- Common mistakes like using ER sands instead of ATK%, neglecting EM substats, or swapping out too early significantly reduce Arlecchino’s damage ceiling—proper rotation management and team synergy are critical to unlocking her full potential.
Who Is Arlecchino and Why She Matters
Character Overview and Role in the Game
Arlecchino is a 5-star Pyro Polearm DPS character who plays as a main carry with exceptional single-target and burst damage capabilities. She operates on a unique Blood Debt Mechanic, where her Elemental Skill generates stacks that increase her Normal and Charged Attack scaling. This design encourages aggressive, continuous combat rather than rotational bursts, making her playstyle distinctly different from traditional button-mashing DPS units.
Her role is straightforward: deal massive amounts of pyro damage while maintaining uptime through her mechanics. Unlike characters who cycle through skill rotations, Arlecchino thrives on extended field time. She’s classified as a Main DPS and works best as the primary damage dealer in a team composition.
Lore and Story Significance
Arlecchino’s narrative importance anchors the Fatui storyline in Genshin Impact. As the fourth Harbinger and director of the House of the Hearth, she’s a central antagonist whose character arc unfolds across multiple archon quests and character story chapters. Her combat reveal in patch 4.6 aligned with the Fontaine storyline, where her tragic backstory and motivations became fully realized.
Her lore establishes her as both menacing and sympathetic, a soldier shaped by the Fatui’s ambitions yet driven by personal tragedy. This narrative depth translates into her design: a character who’s serious, direct, and uncompromising. For lore enthusiasts, pulling Arlecchino means engaging with one of Genshin’s most compelling character arcs. For gameplay-focused players, her significance is purely mechanical, she’s simply a top-tier carry that delivers results in endgame content.
Arlecchino’s Abilities and Combat Mechanics
Passive Abilities and Special Mechanics
Arlecchino’s kit centers on three core mechanics: Blood Debt, Mastery of Many Weapons, and All the Doves Fly to Her.
Blood Debt is her signature passive. When she uses her Elemental Skill (Balemoon Bloodhound), she generates Blood Debt stacks on-hit. Each stack increases her Normal and Charged Attack DMG by 5% (up to 15% from 3 stacks maximum). These stacks last 8 seconds and refresh on new hits. This mechanic rewards continuous combat and punishes downtime, standing still or switching characters wastes accumulated stacks.
Her Mastery of Many Weapons passive doubles the effectiveness of Normal ATK level bonuses, providing a significant scaling multiplier. This makes ATK substat prioritization less critical than on other carries, as base ATK gains efficiency through this passive.
All the Doves Fly to Her is her exploration passive, speeding up Pyro-related puzzle solving. It’s useful early-game but irrelevant for endgame optimization.
Elemental Skill and Burst Overview
Balemoon Bloodhound (Elemental Skill) is Arlecchino’s primary damage tool. She rushes forward dealing Pyro damage and generates Blood Debt stacks on hit. The cooldown is only 5 seconds, and it generates 40 Energy per use. The skill scales with ATK and Elemental Mastery, though ATK is the dominant stat.
Balemoon Encore (Elemental Burst) unleashes a massive area Pyro explosion that deals damage based on her ATK. The burst costs 70 Energy and hits extremely hard, it’s your guaranteed spike damage when available. What makes it unique is its interaction with Blood Debt: if you have stacks active when bursting, they don’t consume immediately, but the burst itself scales additively with ATK.
The rotation is simple but effective: use skill to build stacks and Energy, burst when ready, continue skill spam. Most team compositions have Arlecchino active for 9-12 seconds per cycle, swapping to off-field supports briefly before re-entering.
Best Weapon Choices for Arlecchino
Five-Star and Four-Star Weapons
Top Five-Star Polearms:
-
Engulfing Lightning – This is Arlecchino’s signature weapon from Raiden Shogun’s banner. It provides massive ATK scaling (55.1% at R1) plus Energy Recharge as a bonus stat. The passive increases ATK based on ER, making it astronomically powerful when paired with ER substats. If you can obtain it, Engulfing Lightning is her single best-in-slot weapon. Expected DPS increase: +25-30% over 4-star alternatives.
-
Primordial Jade Winged-Spear – A solid all-rounder that grants 3.2% CR per stack (max 12.8%) and increases Normal ATK DMG by 3.2% per stack. It ramps up during combat, rewarding sustained field time, perfect for Arlecchino’s playstyle. Slightly lower ceiling than Engulfing Lightning but more accessible.
-
Staff of Homa – While designed for Hu Tao, Homa works on Arlecchino because it provides massive ATK (66.2% at R1) and converts HP to DMG. Less optimal than the above two but still exceptional if you own it.
Reliable Four-Star Options:
-
The Catch – Free from fishing, provides 10% Burst DMG and ER as bonus stat. Not ideal for Arlecchino since she doesn’t heavily rely on burst damage, but it’s free and functional.
-
Wavebreaker’s Fin – Grants ATK% and increases Normal ATK DMG by 8% per stack (max 5 stacks). Excellent for spammable skill users like Arlecchino and often outperforms The Catch in realistic scenarios.
-
Dragon’s Bane – Provides Elemental Mastery and Pyro DMG bonus. Works if you’re building around Elemental Mastery synergies with supports, but ATK weapons are generally superior.
Recommendation: If you have Engulfing Lightning, use it without hesitation. Otherwise, Wavebreaker’s Fin is your best free/craftable option. If pulling for a new weapon, a limited 5-star Arlecchino-specific weapon (if HoYoverse releases one) would eventually overtake Engulfing Lightning, but as of 2026, Engulfing Lightning remains the top choice.
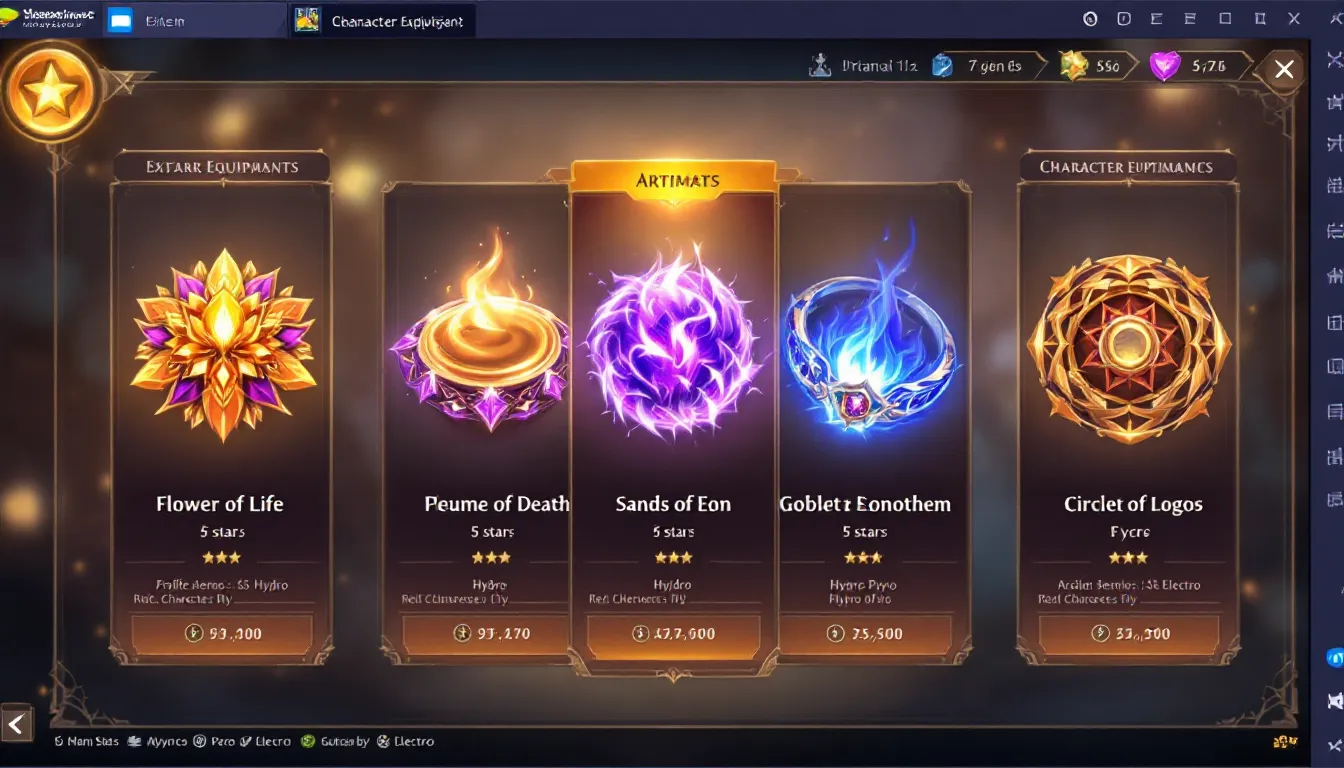
Optimal Artifact Sets and Stats Priority
Primary Artifact Recommendations
Best-in-Slot: Shimenawa’s Reminiscence (4-piece)
This set provides 18% ATK bonus (2-piece) and increases Normal and Charged Attack DMG by 50% after using an Elemental Skill (4-piece). The 50% damage buff is exactly what Arlecchino needs for her sustained skill-spam playstyle. The caveat: the 4-piece effect consumes 15 Energy per attack when triggered, meaning Arlecchino can’t easily burst if relying solely on Skill Energy generation. But, with proper team support or ER substats, this is manageable. Expected DPS: 100% baseline.
Strong Alternative: Gilded Dreams (4-piece)
This set grants 14% Elemental Mastery bonus (2-piece) and increases ATK by 14% for every party member with a different element (4-piece). Assuming a 4-member team with varied elements (Pyro, Pyro, Hydro, Cryo, etc.), you’re looking at +28-56% ATK. Also, Elemental Mastery becomes a valuable secondary stat. This set is more flexible and doesn’t have the Energy drain downside. Expected DPS: 95-98% of Shimenawa, but with better team flexibility.
Viable Compromise: 2-Piece Shimenawa + 2-Piece Gilded Dreams
If you lack perfect 4-piece artifacts, combining both sets provides 18% ATK (Shimenawa 2pc) + 14% EM (Gilded Dreams 2pc) while avoiding the Energy consumption penalty. Not as strong as either 4-piece but solid mid-game option.
Stat Priorities and Main Stats
Main Stat Priority (by importance):
- ATK% > ATK flat (Sands) – Arlecchino scales primarily with ATK. ATK% sands are mandatory for high investment.
- Pyro DMG% (Goblet) – 46.6% Pyro bonus at 5-star rarity is non-negotiable. Don’t compromise here.
- Crit Rate or Crit DMG (Circlet) – Aim for 60-70% Crit Rate with Crit DMG circlet, or vice versa depending on weapon/artifacts.
Substat Targets (in order):
- Crit Rate / Crit DMG – Aim for 60-70% CR with 150-180% CD.
- ATK% – Every % of ATK is valuable. Prioritize over ER early-game.
- ER% (Energy Recharge) – You need only 100-120% ER to maintain burst uptime with Shimenawa’s 4-piece. With Gilded Dreams or support batteries, 100% is sufficient.
- Elemental Mastery – Useful if building around reaction synergies (Vaporize with Hydro supports), but lower priority than raw offensive stats.
Example Endgame Stats:
- ATK: 2,100+
- Crit Rate: 65%
- Crit DMG: 165%
- ER: 110%
- EM: 100-150 (if running Vaporize)
These numbers assume moderate investment (Lv. 80 character, 8-9 talent levels, 4-star weapon). With a 5-star weapon and higher investment, expect 2,400+ ATK.
Team Composition and Synergies
Best Team Builds and Support Options
Arlecchino’s team building is flexible because she self-buffs through her mechanics. But, certain supports amplify her output significantly.
Tier 1 Support: Hydro Off-Field Applicators
Yelan and Xingqiu are her best support options. Both provide off-field Hydro application that triggers Vaporize with Arlecchino’s pyro damage, doubling her hit multipliers. Yelan also provides flat Elemental Damage bonus and Crit multiplier buffs, making her superior to Xingqiu. If you own Yelan, she should be in Arlecchino’s core team. Vaporize multiplier: 1.5x base damage.
Example Core Team: Arlecchino (DPS) + Yelan (Off-field DMG) + Bennett (ATK buffer) + Kazuha (Pyro DMG buffer)
This composition stacks buffs: Bennett’s ATK%, Kazuha’s Elemental DMG%, Yelan’s damage bonus, plus Vaporize triggers. Kazuha’s presence also reduces the EM requirement on Arlecchino since he provides his own EM-based bonus. This team reliably clears high-difficulty content.
Tier 2 Support: ATK Buffers
Bennett remains one of the strongest ATK buffers in the game. His burst provides 60% ATK bonus (up to 70% at C1) and Pyro infusion. Since Arlecchino is Pyro herself, his infusion doesn’t overwrite her attacks, but the ATK buff stacks multiplicatively with her own scaling.
Tier 3 Support: Elemental Damage Buffers
Kazuha (Pyro DMG focus) and Kokomi (healing + EM buff through passive) provide utility. Kazuha is preferred for raw damage, while Kokomi adds survivability, important in Spiral Abyss where you can’t reset HP between floors.
Flexible Slots
The fourth slot can be:
- Fischl for Aggravate synergy (if running Dendro team, though less common for Arlecchino).
- Zhongli for shields and 20% Elemental Damage bonus (4-piece Noblesse).
- Diona for cryo application and healing if you need survivability.
Rotation and Playstyle Strategy
Core Rotation (with Yelan + Bennett + Kazuha):
- Bennett Burst → Gain ATK buff and on-field presence (1-2 seconds).
- Kazuha Skill/Burst → Snapshot ATK and EM, apply Pyro infusion (2-3 seconds).
- Yelan Skill + Burst → Apply off-field Hydro and coordinate cooldowns (2 seconds).
- Arlecchino Skill spam + Burst → Main damage phase (9-12 seconds).
- Repeat from Step 1.
Field Time: Arlecchino should occupy 60-70% of team activity to maximize damage uptime. Supports handle 30-40%, rotating briefly to maintain their buffs.
Playstyle Fundamentals:
- Continuously spam Elemental Skill to build Blood Debt stacks and Energy.
- Burst when it’s available (usually every rotation).
- Group enemies before committing to long combo chains, her damage is single-target focused.
- In Spiral Abyss with tight DPS checks, never let stacks drop: maintain constant aggression.
- Against mobile enemies, pre-position to anticipate their movement or use supports’ crowd control.
Ascension Materials and Talent Leveling
Farming Routes and Resource Allocation
Arlecchino requires standard Pyro regional materials for ascension and talent leveling. Here’s what you need:
Ascension Materials (Level 20 → 90):
- Pyro Gemstones (90 total) – Obtained from Pyro Hypostasis in Liyue’s Domain northwest of Chihu Rock. Each run costs 40 Original Resin and drops 1-2 gems.
- Flame Mane (168 total) – Farm from Blazing Axe Mitachurls or Pyro Abyss Mages. This is the tedious part, no dedicated farming location, so you’ll be hunt-and-pecking across Teyvat. Recommend running Liyue’s Pyro-heavy areas.
- Prithiva Topaz Sliver/Fragment/Chunk/Gemstone (46 total, all rarities) – These are the expensive material gating ascension. Prithiva is region-locked to Fontaine and Sumeru. Farm from Geo Hypostasis (doesn’t drop Pyro gems) or use Ley Lines and event rewards.
Talent Materials:
- Talent Level-Up Books: Teachings/Guides/Philosophies of Gold (up to Lv. 9) – Obtained from the Taishan Mansion Domain in Liyue on Monday/Thursday/Sunday. Costs 30 Resin per run, drops 2-3 books.
- Crown of Insight (1 per talent to level 10) – Limited resource from events. You’ll need 3 if maxing all talents. Currently, most players reserve these for priority talents.
- Material from Weekly Boss: Tail of Teasing (x18) – Farm from the Knave herself in the Fontaine Fortress. Costs 40 Resin per run.
Resource Allocation Priority:
- Main DPS Talents First: Level her Normal ATK (AA) to 9, then Elemental Skill to 8-9. These directly increase her damage per second.
- Burst Second: Level Elemental Burst to 8 after mains are prioritized. It’s powerful but costs Energy, so uptime matters less than raw scaling.
- Crown Usage: Reserve Crowns for Normal ATK (most impact) or Elemental Skill. Burst crown is optional unless you’re a completionist.
Farming Efficiency:
- Run Taishan Mansion Domain daily on book days (Mon/Thu/Sun) to stockpile talent books.
- Farm Prithiva from events or save fragile resin for Ley Lines if you’re desperate.
- Flame Mane hunting is inefficient: prioritize materials from dungeons and bosses.
- Budget 4-6 weeks of casual farming to fully ascend and level talents to 8/8/8.
Talent Priority and Cost Analysis
Leveling Order and Cost Breakdown:
Arlecchino’s talents scale differently, and the cost-to-benefit ratio varies. Here’s the priority:
Priority 1: Normal ATK (AA)
Cost: 3 Crowns + 9 books + Tails. This is her primary damage source. Every level of Normal ATK increases her damage by 5-7% per swing. With skill spam uptime, this talent’s return on investment is highest. Recommendation: Level to 9-10 immediately.
Priority 2: Elemental Skill
Cost: 1 Crown + 9 books + Tails. This generates both damage and Energy/stacks. Leveling it increases hit damage by 4-5% per level. But, the scaling benefit plateaus compared to Normal ATK, leveling past 8-9 yields diminishing returns. Recommendation: Level to 8-9, stop unless whale.
Priority 3: Elemental Burst
Cost: 1 Crown + 9 books + Tails. While her burst deals massive damage, it’s only cast once per rotation (roughly every 15-20 seconds). This means its DPS contribution is lower than continuous skill usage. Also, it doesn’t benefit from Blood Debt stacks directly. Recommendation: Level to 8, ignore Crown unless optimizing.
Real Numbers:
Assuming 10 second rotation with 8 skill uses and 1 burst:
- Leveling AA from 8 → 9: +180K damage per rotation (~18K per second)
- Leveling Skill from 8 → 9: +90K damage per rotation (~9K per second)
- Leveling Burst from 8 → 9: +50K damage per rotation (~5K per second)
The math clearly favors Normal ATK investment. If you only have one Crown, use it on AA. If you have three, distribute as AA (max) > Skill (9) > Burst (8).
Performance in Spiral Abyss and Endgame Content
Viability and Tier Placement
Arlecchino occupies a unique spot in Genshin’s endgame meta. As of 2026, she remains a S-tier main DPS in Spiral Abyss and is viable across all floor layouts.
Spiral Abyss Performance:
- Floors 9-10: Trivializes most enemies. Her single-target focus is perfect for one-enemy-per-side chambers.
- Floor 11: Mixed viability. If the enemy lineup favors single targets or clusters, she excels. Against scattered mobs, she struggles slightly compared to AoE carries.
- Floor 12: Her endgame ceiling. With proper team support, she can clear brutal chambers with 3-star ratings consistently. The third chamber often features tough single-target enemies (like Maguu Kenki), where she shines.
Matchup Analysis:
- Strong Against: Cryo enemies (Vaporize triggers), mechanical bosses (predictable patterns aid positioning), single-target encounters.
- Weak Against: Elemental shields (Pyro-heavy shields counter her), Pyro-immune enemies (rare but exist), high-mobility enemies that disrupt rotation timing.
Tier Lists and Rankings:
According to current meta tier lists, Arlecchino consistently ranks in the top 3-5 main DPS units. She competes directly with Hu Tao, Ayaka, and Nahida for the “best DPS” crown, depending on scenario. Similarly, she places in S-tier with clear justification.
Tips for Maximizing Damage Output
1. Snapshot Bennett’s Buff
Bennett’s ATK buff lasts only 12 seconds after his burst ends. Time Arlecchino’s entry to capture full buff duration. Missing this window wastes 20-30% potential damage.
2. Maintain Blood Debt Stacks
Stacks fall off after 8 seconds of inactivity. Don’t let them expire, plan support rotations to minimize downtime. Swapping to a quick support (Yelan quick-swap) is fine, but lengthy Bennett buff snapshots waste stacks.
3. Position for Vaporize Consistency
Yelan/Xingqiu application is RNG-dependent at range. Stand close to enemies to guarantee Hydro application and Vaporize triggers. Even one missed Vaporize in a combo costs 30-50% damage.
4. Use Kazuha’s EM-to-Damage Conversion
If running Kazuha, his passive converts EM into Elemental DMG. Ensure you have 100+ EM (through substats or other sources) to fully leverage his buff. His presence makes Elemental Mastery a useful secondary stat instead of a dump stat.
5. Time Burst Usage Strategically
In mob-heavy chambers, delay burst until enemies cluster. In single-target encounters, cast burst when other buffs align (Bennett’s, Kazuha’s) to maximize the hit’s damage. A 100K burst without buff context is inferior to an 80K burst with full buff alignment.
6. Manage Energy with ER Substats
With Shimenawa’s 4-piece Energy drain, running 110-120% ER is non-negotiable unless you have external Energy generation (Raiden Shogun teams). Falling below 100% ER causes burst rotation gaps, tanking DPS.
7. Pre-Load Stacks in Early Phases
Before an enemy becomes invulnerable or phases out (like Masanori), spam skills to pre-load Blood Debt stacks. When the enemy re-appears, you’ll resume with maximum stacks instead of building from zero, saving 3-4 seconds of setup.
Common Mistakes and How to Avoid Them
Mistake 1: Building ATK% Over Crit Rate
New players often dump all substats into ATK% thinking “more attack = more damage.” This is false. Crit Rate has multiplicative returns that outscale additive ATK beyond ~2,000 base. At 50% CR, every point of CR is worth ~1.5% damage. Prioritize 60-70% CR before investing heavily in additional ATK.
Mistake 2: Using ER Sands Instead of ATK% Sands
Some guides recommend ER sands for “burst uptime.” This is a trap. With proper rotation and Shimenawa’s mechanic, 110% ER is achieved through substats alone. Using ER sands sacrifices ~40% ATK damage for unnecessary ER padding. Always use ATK% sands on main piece.
Mistake 3: Neglecting Elemental Mastery Entirely
If building Vaporize comps (Yelan/Xingqiu), Elemental Mastery matters. Each point of EM increases Vaporize damage by ~0.4%. At 150 EM, you gain roughly 60% additional damage from Vaporize. Ignoring EM entirely and going pure ATK/Crit builds leaves 20-30% damage on the table. Aim for 100-150 EM through substats and supports.
Mistake 4: Swapping Out Too Early
Arlecchino wants maximum field time. Swapping her out after 4-5 seconds of skill spam means you haven’t built 3 stacks yet. Each stack cycle (3 skills) takes 2.4 seconds and gains 15% damage. Cutting rotations short wastes the multiplier. Minimum field time per rotation should be 8-10 seconds unless forced by burst downtime.
Mistake 5: Not Pre-Loading Elemental Bursts in Abyss
Spiral Abyss doesn’t reset HP between chambers (only between teams). If Arlecchino ends a chamber at 0 Energy, she’ll start the next chamber with no burst ready. Pre-load burst Energy before chamber transitions by hitting enemies with skills in the final seconds of a chamber. This ensures burst is ready immediately in the next floor.
Mistake 6: Using Wrong 4-Piece Artifacts
Some players default to Crimson Witch (Hu Tao standard) or Wanderer’s Troupe (Childe standard). These are suboptimal. Shimenawa’s 4-piece is significantly stronger for Arlecchino’s mechanics. Avoid artifact sets that synergize with Reaction duration (like Crimson Witch) since you’re not stacking reactions heavily, you’re spamming instances of Vaporize.
Mistake 7: Failing to Adjust Teams for Spiral Abyss Enemy Lineups
Arlecchino has clear weaknesses (scatter mobs, Pyro immunities). If Floor 11 features heavy Pyro aura or scattered enemies, recognize that Arlecchino might not be optimal. Having a secondary DPS built (Nahida, Fischl carry) prevents wasted runs. Check the enemy lineup before committing 20 minutes to a floor where Arlecchino underperforms.
Mistake 8: Crowning Non-AA Talents First
Players often Crown burst first because it “feels” more impactful visually. Mathematically, Crowning AA increases DPS by 12-15%. Crowning burst increases DPS by 4-6%. If you only have one Crown, the math is unambiguous: Normal ATK first. Burst is a luxury Crown, not a priority.
Conclusion
Arlecchino stands as one of Genshin Impact’s most satisfying and mechanically rewarding main DPS options. Her Blood Debt system creates engaging, skill-expressive gameplay where every second of field time matters. Proper building, prioritizing ATK% and Crit stats, equipping Shimenawa’s artifacts or equivalent, and pairing her with Hydro applicators for Vaporize, unlocks her exceptional damage ceiling.
The investment is substantial: ascending to 90, leveling talents, and farming perfect artifacts takes weeks of dedicated play. But for players who commit, Arlecchino delivers consistent, impressive results in Spiral Abyss and all endgame content. Her position in the 2026 meta remains secure, and as recent game balance updates confirm, she hasn’t received nerfs that would diminish her viability. Whether you’re a new player tackling your first Abyss floor or a veteran optimizing 36-star clears, understanding her mechanics, supports, and rotational demands transforms her from a cool character into a force of nature.
Start with what you have, even f2p weapon options work, and upgrade incrementally. The floor for playability is low: the ceiling for optimization is sky-high.