Sigewinne’s arrival in Genshin Impact marked a significant shift in the support meta, bringing a unique blend of healing, hydro application, and team utility that challenges traditional party compositions. As a 5-star hydro catalyst user introduced in recent patches, she’s quickly become a cornerstone pick for players looking to optimize their Spiral Abyss clears and domain runs. Whether you’re a newer player still building your roster or a seasoned veteran refining your teams, understanding Sigewinne’s mechanics and potential opens up fresh strategies you might not have considered. This guide breaks down her talents, optimal builds, team synergies, and practical combat rotations to help you unlock her full potential.
Table of Contents
ToggleKey Takeaways
- Sigewinne is a 5-star hydro catalyst support who excels in freeze, bloom, and vaporize teams by providing consistent hydro application, reliable healing, and meaningful damage output without sacrificing field time to main DPS carries.
- Optimal artifact builds for Sigewinne depend on playstyle—use 2-Maiden/2-Tenacity for general support, 4-Instructor for bloom-focused teams, or 4-Tenacity for aggressive Spiral Abyss strategies, while maintaining 160-180% Energy Recharge as a core priority.
- Sigewinne’s dual-scaling kit (HP and ATK) encourages tank-support builds that feel rewarding in combat, with endgame stat targets of 25,000-30,000 HP, 1,800-2,200 ATK, and consistent energy management enabling strong burst uptime.
- Pull Sigewinne if you main Ayaka, Hu Tao, Nahida, or run endgame Spiral Abyss clears, but skip her if you already own strong healers like Kokomi or Bennett—she’s a quality-of-life improvement rather than a mandatory character for newer or casual players.
- Master her optimal 25-30 second rotation by deploying her burst, skill, and normal attacks before switching to your DPS carry, ensuring hydro application never drops during freeze windows and maximizing the particle economy your team depends on.
Who Is Sigewinne?
Sigewinne’s Role and Element
Sigewinne operates as a 5-star hydro catalyst support with a dual focus on healing and elemental damage amplification. Her hydro element makes her invaluable for freeze teams, vaporize comps, and bloom-focused strategies. Unlike pure healers who sit on the sidelines, Sigewinne actively participates in offensive rotations while keeping your team healthy. Her catalyst weapon type grants her flexibility in artifact building and allows her to proc passive effects that benefit the entire party.
What sets her apart from other hydro applicators is her ability to maintain consistent hydro uptime without sacrificing healing efficiency. She fills a niche that many teams desperately needed, a character who doesn’t feel like a full-time babysitter, but rather a contributing member who happens to keep people alive.
Character Background and Story
Sigewinne hails from the underwater nation of Fontaine, where she serves as a researcher and healer with deep connections to Fontaine’s scientific and magical traditions. Her character quest delves into her investigation of mysterious phenomena and her desire to understand the deeper mechanisms of her world. Understanding her background enriches your appreciation for her character design and gameplay philosophy.
In terms of the broader Genshin narrative, she represents HoYoverse’s commitment to expanding Fontaine’s roster with characters that embody the nation’s themes of innovation and discovery. Her placement as a support reflects her role as a guide and protector within the story, translating seamlessly into gameplay mechanics.
Talents and Skill Mechanics
Normal Attack and Charged Attack
Sigewinne’s Normal Attack string consists of four hits that deal hydro damage scaled from ATK. While it’s not the most damaging attack in her kit, it serves an important function: maintaining hydro application for reaction-based teams. Each normal attack hits contribute to the overall elemental gauge, which is crucial for setting up reactions like vaporize or bloom.
Her Charged Attack consumes stamina but fires a hydro projectile with solid AoE coverage. This attack is particularly useful when you need to apply hydro from range or when repositioning isn’t ideal. The charged attack’s scaling is solid enough that it won’t feel like dead weight, though you won’t be spending most of your field time on it.
Elemental Skill Breakdown
Sigewinne’s Elemental Skill is where her support identity truly shines. This ability performs multiple functions: it applies hydro, heals your active character, and generates particle economy for your team. The hydro application is rapid and consistent, making it perfect for freeze teams running alongside cryo applicators like Ganyu or Ayaka.
The healing component scales from her max HP and ATK, incentivizing you to build her with generous HP investments. This dual scaling is brilliant design, it encourages tank-support builds that feel rewarding in real combat situations. The skill also benefits from elemental mastery due to its interaction with certain passives and team compositions.
Cooldown management is straightforward, with reasonable downtime that rewards proper rotation planning. The particle generation is generous enough that battery characters aren’t strictly necessary, though they do accelerate burst uptime.
Elemental Burst and Energy Requirements
Sigewinne’s Elemental Burst is her ultimate tool for team support, creating a persistent hydro field that deals damage over time and applies hydro to enemies repeatedly. This burst damage scales primarily from ATK, making it contribute meaningfully to your team’s offensive output. Unlike many support bursts that feel like insurance policies, hers actually hurts enemies.
The energy requirement sits at 80, which is manageable with proper particle generation and a decent battery. The burst duration is long enough to cover multiple skill rotations, creating windows where you can switch to your damage dealers without worrying about hydro application falling off. This is a massive quality-of-life improvement over characters who require constant field time to maintain their utility.
The burst also provides a subtle defensive layer by keeping enemies within hydro, enabling elemental reactions that might stagger or control enemy behavior. It’s another example of Sigewinne’s well-rounded design philosophy.
Optimal Build Paths for Sigewinne
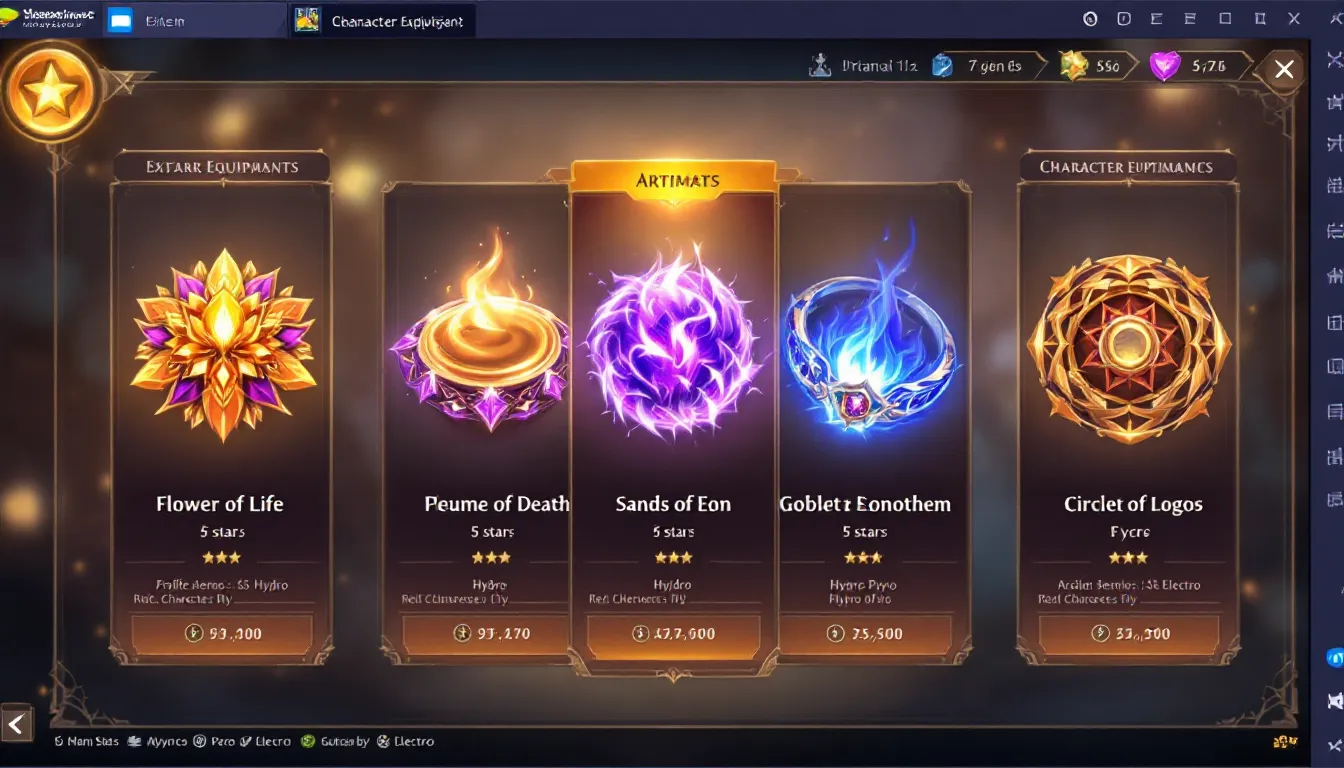
Artifact Recommendations
For mainstream builds, 2-piece Maiden Beloved + 2-piece Tenacity of the Millelith is the go-to combination. This pairing provides healing bonus and team ATK buff through Tenacity’s passive, making your burst hits harder while keeping everyone topped off. The 4-piece Tenacity is viable if you’re consistently applying hydro with your skill, though the 2+2 split often feels more balanced in practice.
Alternatively, 4-piece Instructor’s works brilliantly in elemental mastery-dependent teams like bloom variants. Since Sigewinne applies hydro regularly, activating the Instructor passive is trivial. This build excels in teams where reaction damage outscales direct hits, exactly the environment bloom and aggravate comps operate in.
Artifact mainstats prioritize:
- Circlet: Healing Bonus or HP% (depending on whether you prioritize healing or damage)
- Goblet: Hydro DMG Bonus
- Sands: ATK% or HP%
Substats should emphasize Energy Recharge early on, you want at least 160-180% to comfort your burst rotation. After that, stack ATK and HP equally, since her scaling benefits from both. Crit stats are generally skipped unless you’re running her in an on-field DPS role.
Weapon Selection Guide
Prototype Amber (craftable) is Sigewinne’s best 4-star weapon, providing energy recharge and a burst healing passive that stacks with her natural healing. If you’ve been crafting and refining it, you’re already ahead. The energy recharge especially makes particle generation less painful.
For 5-star options, Lost Prayer to the Sacred Winds offers consistent ATK and elemental damage scaling, making your burst hit meaningfully harder. Everlasting Moonglow is another premium pick if you own it from another character’s banner, providing HP scaling that feeds directly into her healing output.
Favonius Codex deserves mention as a solid support alternative. Its energy recharge is excellent, and the passive generates particles for your whole team when you land crit hits. If your artifact rolls are weak on ER, Favonius bridges the gap perfectly.
Under no circumstances should you use weapons like Mappa Mare or Widsith unless you’re desperate, they don’t synergize well with her support role and sacrifice energy efficiency.
Stat Priority and Ascension Materials
Ascension-wise, Sigewinne requires standard hydro catalyst materials: Shivada Jade Sliver/Fragments/Chunk from Electro Hypostasis, Hydro Samachurl drops, and Lightless Silk from Fontaine’s underwater domains. Standard grind, but the light cones or books might be bottlenecks if you’re leveling multiple characters.
End-game stat targets for a standard support build:
- HP: 25,000-30,000 minimum (feeds healing)
- ATK: 1,800-2,200 (burst damage and skill hits)
- Energy Recharge: 160-180% (burst uptime)
- Hydro DMG Bonus: 46.6% (from goblet, helps burst scaling)
- Healing Bonus: 0-20% (nice to have, but not essential if HP is high)
These targets assume mid-tier artifacts. Whale accounts will comfortably exceed them, while free-to-play builds might sit slightly below without suffering noticeably. The beauty of Sigewinne’s design is that she’s forgiving of imperfect stats as long as the core pillars (ER, HP, ATK) are established.
Best Team Compositions with Sigewinne
Support and Enabler Roles
Sigewinne shines brightest when paired with characters who benefit from consistent hydro application. Freeze teams are her natural home, pairing her with Ayaka and a cryo battery like Shenhe or Ganyu creates a rotation where hydro is always available for freeze reactions. The healing allows you to face-tank enemy attacks without worrying about chip damage ruining your freezes.
Bloom teams similarly appreciate her consistent hydro delivery. Composing a team around Nahida (dendro applicator) and Sigewinne (hydro support), with a flex slot for another dendro character or a flex DPS, unleashes bloom reactions that scale independently of your character levels. This makes bloom teams incredibly efficient for newer players.
Vaporize carries like Hu Tao or Alhaitham benefit from her off-field hydro application and healing. She enables their DPS rotations without requiring them to swap constantly, freeing up field time for your actual damage dealers. The healing also gives Hu Tao’s low-HP playstyle some breathing room.
Damage Carry Configurations
Sigewinne can pivot toward more aggressive compositions depending on your damage dealer. A classic setup pairs her with Ayaka (Cryo DPS) + Shenhe (Cryo buffer) + Kazuha (Elemental Damage buffer). This team carries you through most Spiral Abyss content with minimal stress.
For bloom-focused damage, the “Tao-based Bloom” team runs Hu Tao (Pyro DPS) + Sigewinne (Hydro) + Nahida (Dendro applicator) + Kazuha (buffer). The synergy between spreading hydro for blooms while Hu Tao applies pyro creates a reaction loop that trivializes mid-tier difficulty content.
Aggravate teams incorporating Fischl (Electro applicator) + Nahida (Dendro) + Sigewinne (Hydro) benefit from her ability to apply multiple elements while maintaining team safety. Though less meta than pure aggravate, this opens interesting exploration and overworld grinding strategies.
Domain and Abyss Performance
In Spiral Abyss floors, Sigewinne’s value fluctuates based on the blessing and enemy lineup. When the blessing favors elemental damage or reaction-based damage, she climbs the tier rankings. Floors with elemental damage requirements (hydro, for instance) turn her into an obvious include.
Her performance in talent level-up domains is exceptional, her healing keeps your team stable while her hydro application enables reactions that soften enemy attacks. Players farming Nahida or other popular character talent books will find her presence makes runs feel smoother and faster.
For endgame artifact domains, she eliminates the need for dedicated shielders, freeing up a team slot for additional damage or utility. This flexibility is why experienced players consider her a quality-of-life improvement even if she’s not always the numerical “best” pick.
Advanced Combat Tips and Rotation Strategy
Maximizing Skill Rotation Efficiency
Sigewinne’s optimal on-field rotation typically spans 25-30 seconds depending on your team composition. The general flow is: Burst → Skill → Normal Attacks → Switch to DPS carry. This sequence accomplishes multiple goals simultaneously, applying hydro, healing, and generating the particle economy your carry needs.
When your DPS is on-field, Sigewinne should be off-field, only returning when her skill comes off cooldown or when healing is needed. The exception is burst windows, where you’ll want her back on-field specifically to deploy her burst, then swap immediately. This minimizes unnecessary field time while maximizing her contribution.
For freeze teams, timing your burst before your cryo carry’s damage window ensures consistent hydro application for the entire window. This prevents enemies from unfreezing due to application gaps. The skill-off-cooldown rule matters less in freeze since you’re frozen anyway, but particle generation remains important for rotation smoothness.
Energy Management and Cooldown Optimization
Particle economy is where Sigewinne rotations become intricate. Her skill generates 3 particles per cast on a roughly 10-second cooldown. With 160-180% ER, these particles accumulate into burst uptime between 50-70% of your active rotation. This is acceptable, though some teams benefit from a dedicated battery.
Energy battery partners include Fischl (if running aggravate), Nahida (if running bloom), or Shenhe (if running freeze). Having one battery character accelerates burst uptime without requiring you to build Sigewinne with excessive ER, freeing up artifact stats for ATK or HP.
Cooldown management involves planning your skill usage so it’s available when you swap back to Sigewinne. If your DPS rotation lasts 15 seconds and Sigewinne’s skill cooldown is 10 seconds, you’ll have downtime, this is expected and manageable. The goal is ensuring her burst is always available when you need an offensive push or defensive reset.
One underutilized optimization: intentionally taking damage before swapping to Sigewinne. Since her skill healing scales from max HP, allowing your carry to take some chip damage (without dying, obviously) means her healing output is more meaningful. This subtle planning can improve rotation efficiency in high-DPS windows.
When to Pull: Is Sigewinne Worth It?
If you’re running freeze or bloom teams, Sigewinne is a high-priority pull. She’s not mandatory, previous supports like Mona or Kokomi work fine, but she meaningfully improves team comfort and DPS ceilings. The difference between a well-built Sigewinne and a mediocre Kokomi often translates to clearing a floor 10-15 seconds faster in Spiral Abyss, which is the difference between a 3-star clear and a 2-star miss.
For newer players or f2p accounts, skip her if you already own a strong healer. Kokomi, Bennett, or even Barbara (with proper build) fulfill similar roles, albeit with different trade-offs. Sigewinne shines in optimized, endgame-focused accounts where every percentage point matters. If you’re still building foundational teams, spending on a DPS carry instead yields broader benefits.
Competitive or Abyss-focused players should prioritize her if she suits your existing DPS roster. If you main Ayaka, Hu Tao, or Nahida, Sigewinne pairs phenomenally well with all three. If you’re a casual overworld explorer or don’t care about Spiral Abyss stars, her utility feels less critical.
One practical consideration: banner cycles and future reruns matter. If Sigewinne’s banner appears alongside another character you desperately need, waiting for her solo rerun might be smarter. HoYoverse typically reruns popular supports every 4-6 patches, so patience isn’t unrewarded.
For actual decision-making, consider where your account’s weak points lie. Does your team die too often? Sigewinne helps. Do your reaction damage numbers feel underwhelming? She amplifies that too. Does your hydro applicator feel clunky? She fixes that. If none of these resonate, she’s less essential.
Conclusion
Sigewinne represents HoYoverse’s continued refinement of support character design in Genshin Impact. She isn’t the most essential 5-star ever released, but she’s genuinely strong, versatile, and fun to use, a rare combination that makes her worth the primogem investment for most players. Her healing is reliable, her hydro application is consistent, and her damage output contributes meaningfully to team performance.
The builds outlined above cover mainstream approaches, but Sigewinne’s flexibility means experimentation is rewarded. Whether you’re running her in a freeze team protecting Ayaka, a bloom composition amplifying Nahida’s reactions, or a casual overworld grind where her consistent healing removes all tension, she adapts seamlessly.
As Genshin Impact continues evolving toward 2026 and beyond, characters like Sigewinne who combine utility, survivability, and damage create the kind of rosters that feel bulletproof in endgame content. If you’re on the fence about pulling, remember that revisiting Genshin Impact during her rerun is always an option, but many players who do eventually pull her wonder why they waited so long.
Quick Build Reference for Different Playstyles
Here’s a condensed breakdown for different account types:
Casual/Overworld Players
- Weapon: Prototype Amber or Favonius Codex
- Artifacts: 2-Maiden/2-Tenacity
- Priority: HP > ER > ATK
- Result: Your team never dies, and enemies melt anyway
Freeze Team Enthusiasts
- Weapon: Lost Prayer or Favonius Codex
- Artifacts: 2-Maiden/2-Tenacity or 4-Tenacity
- Priority: ER (170%) > ATK > HP
- Result: 100% burst uptime freeze locks that feel oppressive
Bloom Team Specialists
- Weapon: Prototype Amber (refined)
- Artifacts: 4-Instructor or 2-Maiden/2-Tenacity
- Priority: ER (160%) > EM > HP > ATK
- Result: Bloom reactions that scale independently of character levels
Spiral Abyss Grinders
- Weapon: Lost Prayer or Everlasting Moonglow
- Artifacts: 4-Tenacity of the Millelith
- Priority: ER (175%) > ATK > HP
- Result: Your burst hits hard, your carry hits harder, enemies despair
Each approach balances different priorities, but all share the core philosophy: Sigewinne keeps your team alive while enabling reactions and damage that feels rewarding. Finding where she fits in your specific account is the key to unlocking her full potential.
The recent Genshin Impact trends 2026 point toward support characters like Sigewinne becoming increasingly important as enemy difficulty ramps up. Players exploring best Genshin Impact characters often discover that supports amplify their damage carries far more effectively than pulling additional DPS characters. If you’re newer to the game, a solid Genshin Impact guide can help contextualize where Sigewinne fits into your progression journey.
For those refining combat mechanics, understanding Genshin Impact techniques like energy management and rotation timing directly impacts how effectively you deploy Sigewinne in real combat scenarios. Many players exploring Genshin Impact tips specifically for support optimization find that Sigewinne’s flexibility rewards experimental team building. If you’re looking for broader strategic insights, Genshin Impact examples of successful teams often feature her prominently.
Outside of Youngbow’s ecosystem, resources like Game8 and RPG Site maintain tier lists and build comparisons that frequently rank Sigewinne among the highest-rated supports. For detailed walkthroughs and step-by-step guides, Twinfinite offers comprehensive coverage of character builds and team compositions across popular RPGs including Genshin Impact. These external perspectives complement the strategies outlined in this guide and provide additional validation for the approaches discussed.